Creating a Proxy
A proxy is a wrapper object that allows you to intercept and modify operations performed on the wrapped object, allowing us to add custom behavior or validations to the object’s properties and methods. So this immediately strikes me as middleware of sorts in Node/Express. But maybe more precisely it is like an event listener but for data, which allows us to react to changes in an object when data changes.
This is still a bit abstract so let’s look at an example: We wrap an object with a Proxy that can handle different operations, such as when a consumer is setting or getting a property.
const original = {
name: 'John Doe',
age: 30
};
const s = new Proxy(original, handler);
console.log(s.age);
const handler = () => {
get: function(target, property) {
if(property === 'age') {
return target[property] + ' years old'
} else {
return target[property]
}
}
}
In this instance the Proxy is working as a decorator function, adding additional data to our original object. So we never need to use the original object again, we just use the Proxy, in this wrapper design pattern.
💡
A Decorator function is a function that wraps around another function and extends its functionality.
Another cool usage of a Proxy is the ability to use it to validate data types, data binding, and enable reactive programming:
const original = {
name: 'John Doe',
age: 30
};
const s = new Proxy(original, handler);
s.age = 40;
s.age = 'hey!'
const handler = () => {
    set: function(target, property, value) {
        if(property === 'age' && typeof value !== number) {
            throw new TypeError('Age not a number');
        } else {
            target[property] = value;
        }
    }
}
💡
Proxies only work with objects, if we wanted to do something similar with simpler values, we would need to use classes with getters and setters.
A Proxy Trap is a method on a proxy handler that intercepts and customizes a specific operation performed on the target object.
Most used Proxy Traps:
set
get
has
deleteProperty
apply
construct
getOwnPropertyDescriptor
defineProperties
ownKeys
So why are we looking at proxies and their “traps.” Well because if we wrap something like our Store object which has the menu and cart, we can use a Proxy to wrap our Store and whenever there is a change to either property, we can execute other functions to update our UI in reaction to that changed data.
So to make this into an example, let’s create a Proxy that will wrap around our Store and implement a set() function:
const Store = {
menu: null,
cart: []
}
const proxiedStore = new Proxy(Store, {
set(target, property, value) {
target[property] = value;
if(property === 'menu') {
window.dispatchEvent(new Event('appmenuchange'));
}
if(property === 'cart') {
window.dispatchEvent(new Event('appcartchange'));
}
return true;
}
})
export default proxiedStore;
What are we doing here? Since we’re not going to be concerning ourselves with data validation, we can go ahead and simply set this new property to our object. However, now we want to announce that we’ve changed something, but to who? It doesn’t really matter, but this will be similar to a Pub/Sub design pattern where we will dispatchEvent on the global window object with a new event. The name string of the event doesn’t matter, but I guess the convention is all lowercase one string, and some sort of prefix in case the spec changes and there is a cartchange or menuchange event in the future. We also dispatch an event to the global window object instead of the DOM because we now have 2 documents: the DOM and the Shadow DOM.
Now that we’re broadcasting a new event upon data change, for example when we first load the app and in our app.js file, the loadData() function is executed, we need to have a way to listen to this event for anything to happen.
Here we can go back to our MenuPage.js for example, and use the connectedCallback() function and add logic to listen for this event:
export class MenuPage extends HTMLElemtent {
connectedCallback() {
window.addEventListener('appmenuchange', () => {
this.render();
})
}
render() {
if(app.store.menu) {
menu.innerHTML = '';
for(let category of app.store.menu) {
const liCategory = document.createElement('li');
liCategory.innerHTML = `<h3>${category.name}</h3>
<ul class='category'>
</ul>
`;
menu.appendChild(liCategory);
category.products.forEach((product) => {
const item = document.createElement('product-item');
item.dataset.product = JSON.stringify(product);
liCategory.querySelector('ul').appendChild(item);
});
}
} else {
menu.innerHTML = 'Loading...';
}
}
}
Product Item Component
Now, in the last section, we created our product-item custom component, but we haven’t implemented it yet. So again, the browser will see it but not render it since we haven’t registered that custom component with the DOM just yet. Let’s go and do that:
export default class ProductItem extends HTMLElement {
constructor() {
super();
}
connectedCallback() {
const template = document.getElementById('product-item-template');
const content = template.content.cloneNode(true);
this.appendChild(content);
const product = JSON.parse(this.dataset.product);
this.querySelector('h4').textContent = product.name;
this.querySelector('p.price').textContent = `${product.price.toFixed(2)}`;
this.querySelector('img').src = `data/images/${product.image}`;
this.querySelector('a').addEventListener('click', (event) => {
console.log(event.target.tagName);
if (event.target.tagName.toLowerCase() === 'button') {
} else {
app.router.go(`/product-${product.id}`);
}
});
}
}
customerElements.define('product-item', ProductItem);
Now we have all of our product items displayed under their respective product categories!
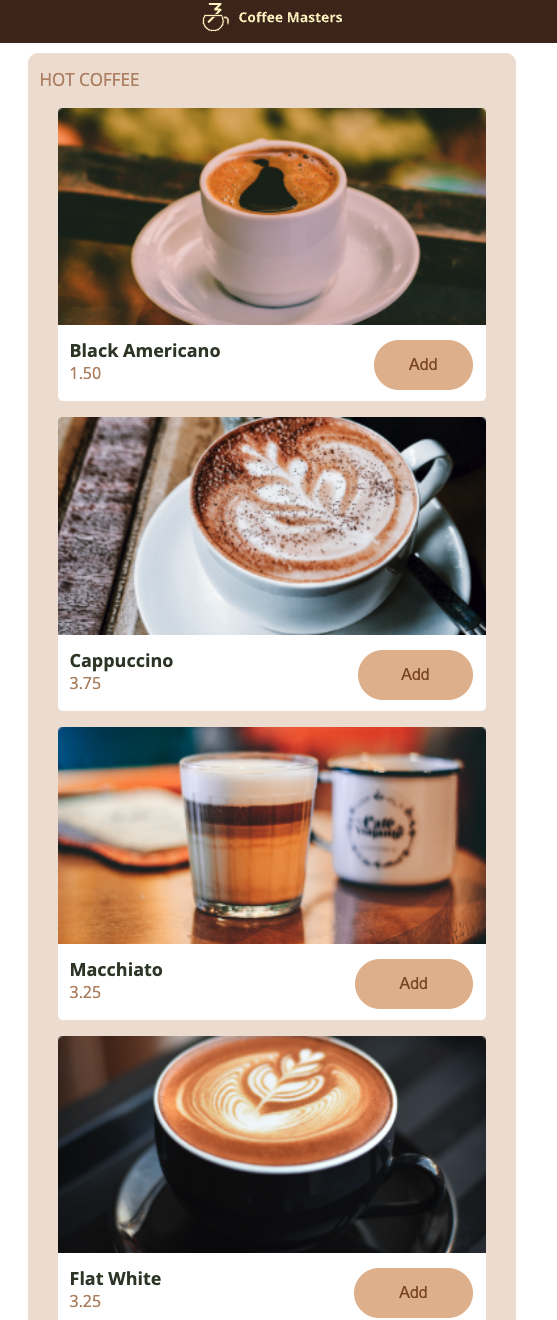
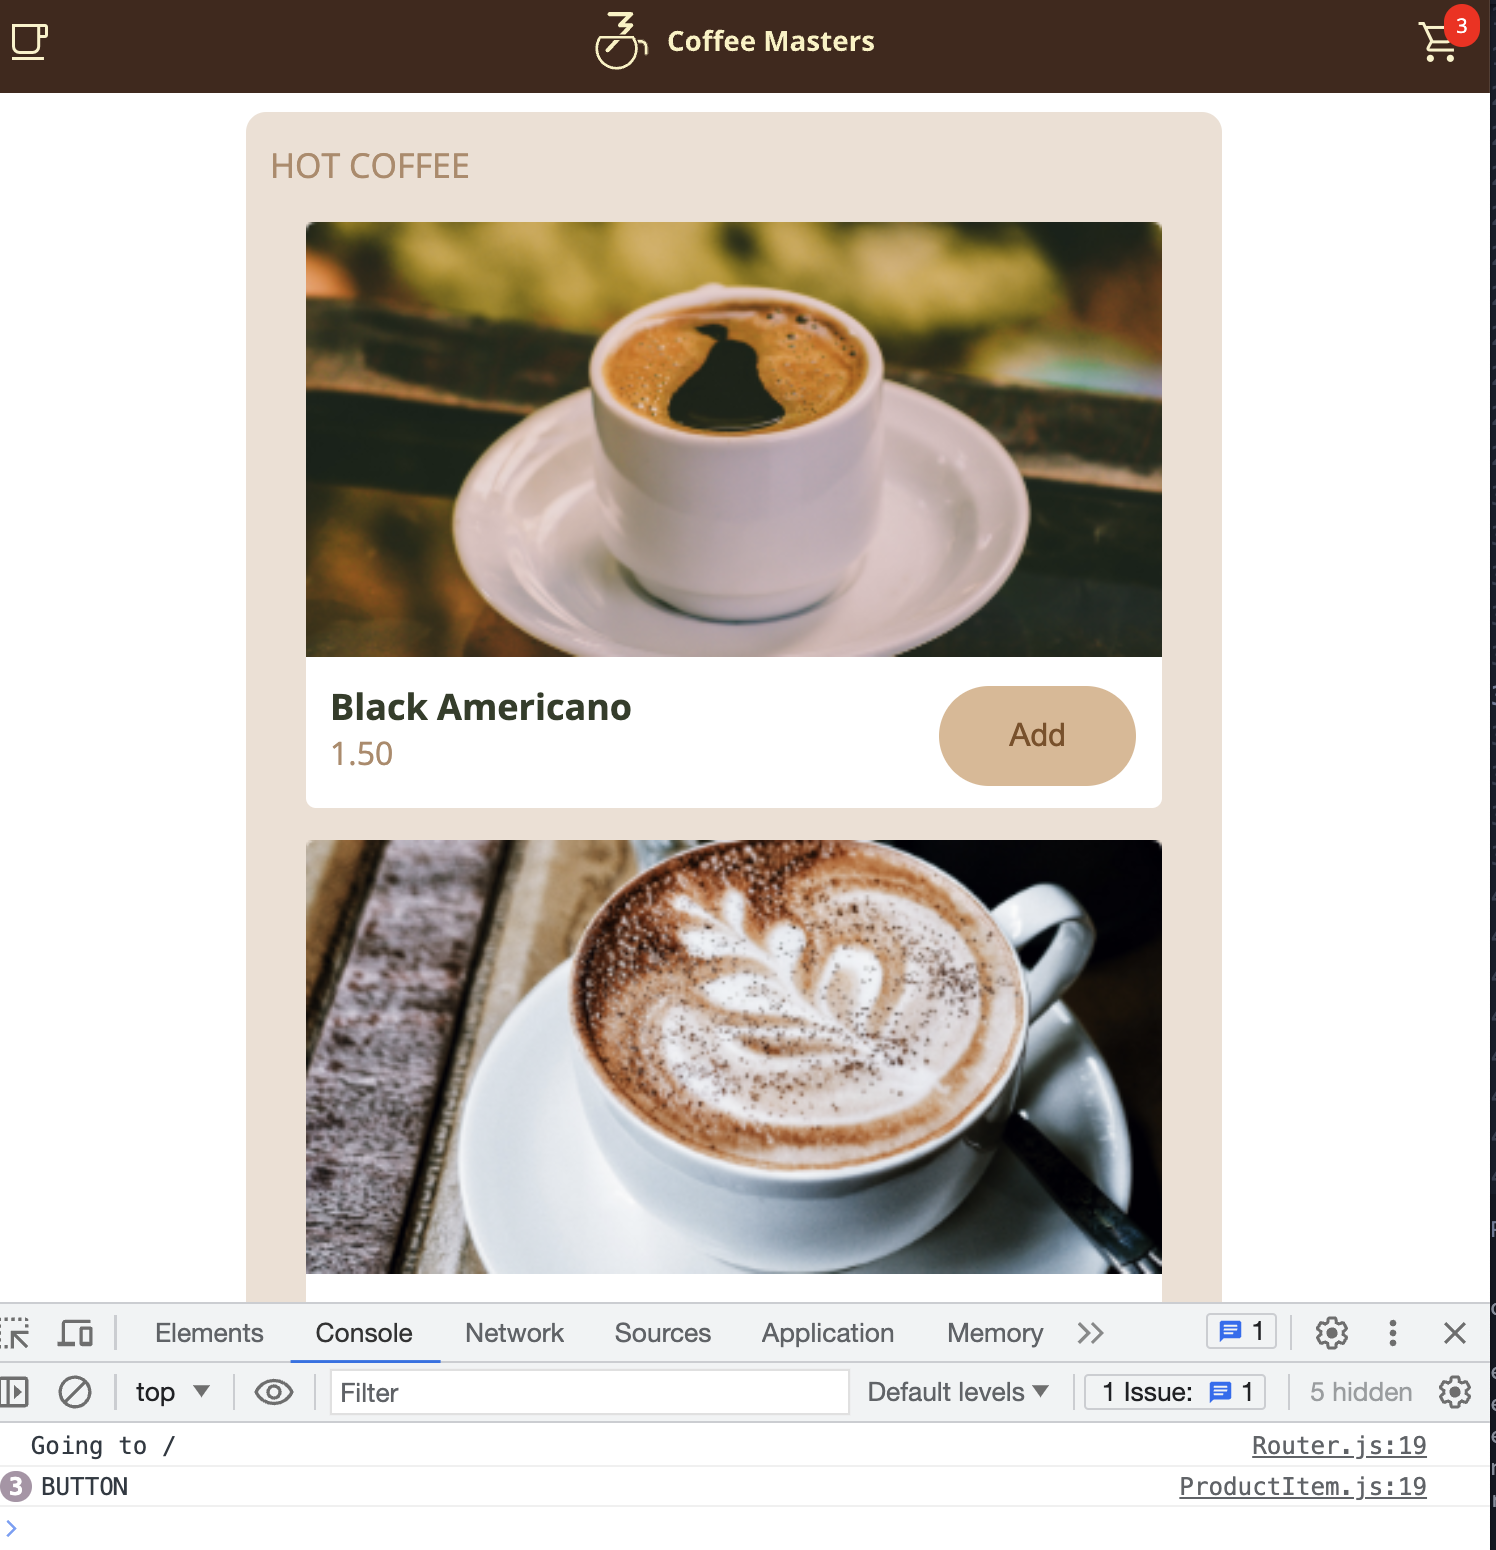
But there’s one thing that’s happening, which is when you go to click any product, it takes us to our product page, which is fine, but we also have an “add” button that isn’t being triggered, since the <a> is wrapping all of our elements up: the img and button. How do we fix this?
We can understand the difference between event.target and event.currentTarget. The difference is that event.target is the underlying element that was clicked, for example, if I clicked on the “Add” button event.target would show button but event.currentTarget would show the <a> tag wrapping the entire element.
For this, we can use JS to parse it out like below:
if (event.target.tagName.toLowerCase() === 'button') {
} else {
app.router.go(`/product-${product.id}`);
}
};
Additionally, we need to get the product by id, in case the menu isn’t loaded:
export async function getProductById(id) {
if (app.store.menu === null) {
await loadData();
}
for (let c of app.store.menu) {
for (let p of c.products) {
if (p.id === id) {
return p;
}
}
}
}
Details Page Component
Now let’s code up the DetailsPage.js file:
import { getProductById } from '../services/Menu';
export default class DetailsPage extends HTMLElement {
constructor() {
super();
this.root = this.attachShadow({ mode: 'open' });
const template = document.createElement('details-page-template');
const content = template.content.cloneNode(true);
const styles = document.createElement('style');
this.root.appendChild(content);
this.root.appendChild(styles);
async function loadCSS() {
const request = await fetch('/components/DetailsPage.css');
styles.textContent = request.text();
}
loadCSS();
}
async renderData() {
if (this.dataset.id) {
this.product = await getProductById(this.dataset.productId);
this.root.querySelector('h2').textContent = this.product.name;
this.root.querySelector('img').src = `/data/images/${this.product.image}`;
this.root.querySelector('.description').textContent =
this.product.description;
this.root.querySelector(
'.price'
).textContent = ` ${this.product.price.toFixed(2)} ea`;
this.root.querySelector('button').addEventListener('click', () => {
app.router.go('/order');
});
} else {
alert('Invalid Product ID');
}
}
connectedCallback() {
this.renderData();
}
}
customElements.define('details-page', DetailsPage);
As I was going about implementing along with the tutorial, I realized that my DetailsPage was causing an error. I kept getting an error that said that there was no product coming back from my getProductByID() function. I double and triple-checked that the function was implemented correctly and it was. Finally through going line by line in my getProductByID() function, I realized that the instructor was using == equality, which allowed JS to coerce the data types he was comparing. Here was the problem line of code:
export async function getProductById(id) {
if (app.store.menu === null) {
await loadData();
}
for (let c of app.store.menu) {
for (let p of c.products) {
if (p.id === id) {
return p;
}
}
}
return null;
}
After casting my id argument into a number, my app worked again. WOW! Crazy how a little thing can break your code, also an additional case in point for TypeScript’s type enforcement. It def would have caught this.
Adding Items to the Order
Now that we’ve got a functioning display of all my products, and can click to go to a product’s detail page, it’s now time to implement the ability to add a product to my order, ie: add something to my cart. Let’s create this final service and call it Order.js within our services directory:
import { getProductById } from './Menu.js';
export async function addToCart(id) {
const product = await getProductById(id);
const results = app.store.cart.filter(
(prodInCart) => prodInCart.product.id === id
);
if (results.length > 0) {
app.store.cart = app.store.cart.map((productItem) =>
productItem.product.id === id
? { ...productItem, quantity: productItem.quantity + 1 }
: productItem
);
} else {
app.store.cart = [...app.store.cart, { product, quantity: 1 }];
}
}
export function removeFromCart(id) {
app.store.cart = app.store.cart.filter(
(productItem) => productItem.product.id !== id
);
}
Now that we’ve implemented our addToCart() and removeFromCart() functions, there are two places we can call it from: the ProductItem and DetailsPage, so let’s go handle those two cases:
async renderData() {
if (this.dataset.productId) {
this.root.querySelector('button').addEventListener('click', () => {
addToCart(this.product.id);
app.router.go('/order');
});
} else {
alert('Invalid Product ID');
}
}
connectedCallback() {
this.querySelector('a').addEventListener('click', (event) => {
if (event.target.tagName.toLowerCase() === 'button') {
addToCart(product.id);
} else {
app.router.go(`/product-${product.id}`);
}
event.preventDefault();
});
}
Now that we’ve updated our code to use our addToCart() function, let’s see how we can check that our code works without finishing our last OrderPage.js component. We can change a badge in our HTML to indicate that our cart changed. To do this, we go back to our app.js and add an event listener for our custom event appcartchange and is one way to do reactive programming-- It’s maybe not the best way, but it’s one way:
window.addEventListener('appcartchange', () => {
const badge = document.getElementById('badge');
const quantity = app.menu.cart.reduce((acc, item) =>
acc + item.quantity, 0)
badge.textContent = quantity;
badge.hidden = quantity === 0;
})
Now when we click on Add on our ProductItem element, it will call our addToCart() function and display the badge on our cart icon like so:
💡
So what’s going on here?: Because we’re wrapping our Store in a Proxy which we used to detect changes to our menu or cart, we can then broadcast our custom DOM event to our app which then allows us to listen to the change and react to that change, in this case by showing the badge on the cart to display the number of items in our cart.
Displaying Items in the Cart
Now what we need to do is build our last component, which is the CartItem:
export class CartItem extends HTMLElement {
constructor() {
super();
}
connectedCallback() {
const item = JSON.parse(this.dataset.item);
this.innerHTML = '';
const template = document.getElementById('cart-item-template');
const content = template.content.cloneNode(true);
this.appendChild(content);
this.querySelector('.qty').textContent = `${item.quantity}x`;
this.querySelector('.name').textContent = item.product.name;
this.querySelector('.price').textContent = `${item.product.price.toFixed(
2
)}`;
this.querySelector('a.delete-button').addEventListener('click', (event) => {
});
}
}
customElements.define('cart-item', CartItem);
💡
One thing to note is that we’re not using the ShadowDOM since we are deciding to share styles and one document, this is more to highlight that we don’t always need the ShadowDOM and it’s up to us when we decided we want to share the CSS with the container or not.
Next, let’s finish our OrderPage.js:
export class OrderPage extends HTMLElement {
  constructor() {
    super();

    this.root = this.attachShadow({ mode: 'open' });
    const styles = document.createElement('style');
    this.root.appendChild(styles);

    async function loadCSS() {
      const request = await fetch('/components/OrderPage.css');
      styles.textContent = await request.text();
    }
    loadCSS();
  }

  connectedCallback() {
    window.addEventListener('appcartchange', () => {
      this.render();
    });

    this.render();
  }

  render() {
    let section = this.root.querySelector('section');
    if (app.store.cart.length === 0) {
      section.innerHTML = `
        <p class='empty'>Your order is empty</p>
      `;
    } else {
      let html = `
        <h2>Your Order</h2>
        <ul>
        </ul>
      `;

      section.innerHTML = html;

      const template = document.getElementById('order-form-template');
      const content = template.content.cloneNode(true);

      section.appendChild(content);

      let total = 0;
      for (let prodInCart of app.store.cart) {
        const item = document.createElement('cart-item');
        item.dataset.item = JSON.stringify(prodInCart);

        this.root.querySelector('ul').appendChild(item);

        total += prodInCart.quantity * prodInCart.product.price;
      }

      this.root.querySelector('ul').innerHTML += `
        <li>
          <p class='total'>Total</p>
          <p class='price-total'>$${total.toFixed(2)}</p>
        </li>
      `;
    }
  }
}

customElements.define('order-page', OrderPage);
Now when we add items to our cart and go to our OrderPage we see a form and total, but no actual CartItems are rendering:

Why is this? It’s because since we’re not using any file bundler that just notices when we’ve created a new component like Webpack, we have to manually let the browser know of the existence of our component. The only way to do this is by going to our app.js file and importing our CartItem file.
💡
The browser doesn’t know about all your files in the server in VanillaJS, you have to call them. If you don’t want to keep forgetting about importing and thereby having your components rendered as empty in the browser, you can include the registering with the DOM line: customElements.define('custom-element', CustomElement) in our app.js file or whatever file is being executed by the browser, because it will actually import the CustomElement
Now that we’ve imported this, we can see all of our cart items and deleting them will update our badge on the cart:
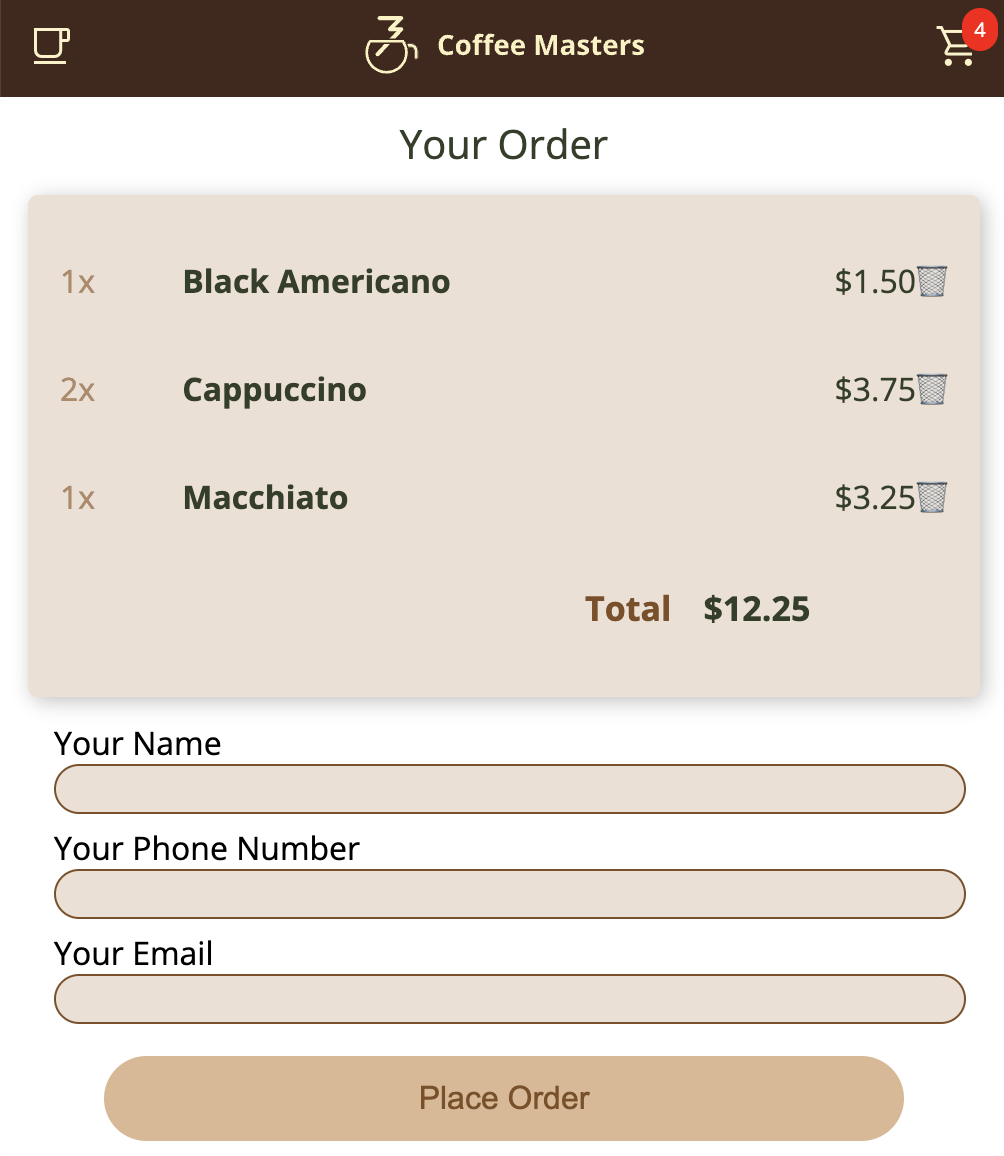
Now that we’ve successfully rendered our CartItems, we can focus on data binding, and double binding, to use our form and capture that data. In VanilllaJS, unlike something like React, it’s not so simple to assign some sort of data model (like in state) and onChange, update everything simply. To do this in VanillaJS, we’ll need to lean on our Proxy knowledge.
In our OrderPage.js:
export class OrderPage extends HTMLElement {
#user = {
name: '',
phone: '',
email: '',
};
setFormBindings(form) {
form.addEventListener('submit', (event) => {
event.preventDefault();
alert(
`Thanks for your order ${this.#user.name}. ${
this.#user.email
? 'We will be sending you the receipt over email'
: 'Ask at the counter for a receipt.'
}`
);
this.#user.name = '';
this.#user.email = '';
this.#user.phone = '';
});
this.#user = new Proxy(this.#user, {
set(target, property, value) {
target[property] = value;
form.elements[property].value = value;
return true;
},
});
Array.from(form.elements).forEach((element) => {
if (element.name) {
element.addEventListener('change', (event) => {
this.#user[element.name] = element.value;
});
}
});
}
render() {
this.setFormBindings(this.root.querySelector('form'));
}
}
customElements.define('order-page', OrderPage);
Ok this is a lot, but before we figure out what’s going on here, we have to think about where our form elements are living. For example, if you were to go to your app and use document.querySelector('form') or input we wouldn’t get anything. Why? Because these form elements live in our Shadow DOM, not the actual browser DOM.
We can use the form.elements syntax since it will return a HTMLFormControlsCollection which will be an array of our elements. We could even then use dot syntax to access specific elements like form.elements.phone for example.
Ok, now— what’s going on here?!
We’re utilizing the # in our user field since this denotes that it’s a private field within our class and will be inaccessible to our consumer anywhere in our app. To learn more the MDN docs explain
setFormBinding(form) function is adding an event listener to the form element that we’re passing into it. Which does a couple of things:
Prevents the default submit event from firing
Alerts the user with a message either telling them receipt will be sent to their email if we have it, otherwise go to the counter
TODO: make a request to the server to send data
Set double data binding ie grab our form.elements.property.value and set it in our Proxy, but also since form.elements is an HTMLCollection, we need to create an Array.from() it to be able to use something like forEach() to iterate through it. So now if we change the form, we change the user, and if we change the user, we are changing the form.
- Isn’t this an infinite loop though? Nope, since we're changing the user itself in the Proxy, it doesn’t trigger a change event, the change event is only triggered when the user is updating the UI ie: filling out the form
After our alert, we need to reset our form fields with empty strings so that once the user submits the form, it resets the contents.
And we need to return true in our set() function, or else our Proxy will send an error that it returned falsish
this.setFormBindings() should be called in our render() function so that our form element can be grabbed and passed to the function after the rest of the rendering function is executed.
And boom! Now after submitting the form and getting our alert, our form resets itself through our use of double data binding. This is the same way I do it in React, and it’s kinda cool to see the implementation with VanillaJS and no abstractions. It isn’t as scary as I thought.
Now, there is one last bug to fix. When we go from the Menu page to the order and back, to the Menu page, we don’t see any data. I always need to refresh the page. What’s going on here?
So if we look at our connectedCallback() function in MenuPage.js:
connectedCallback() {
window.addEventListener('appmenuchange', () => {
this.render();
});
this.render();
}
As we have it now, when the component is connected to the DOM, we only call render when there is an appmenuchange which is our custom event. However, when we go back on our browser, this event isn’t triggered, since our menu didn’t change. The way to fix is by adding another call to render within our connectedCallback so that it fires whenever the MenuPage is connected to the DOM.
And we’re done! Thanks for joining my journey wrapping up this course and deepening my understanding of VanillaJS! Next up I'll be documenting writing a simple To-do App in VanillaJS with Jest for a TDD approach and in parallel start working on the UC San Diego Coursera course on Data Structures and Algorithms so that I can crush it in any technical interview!